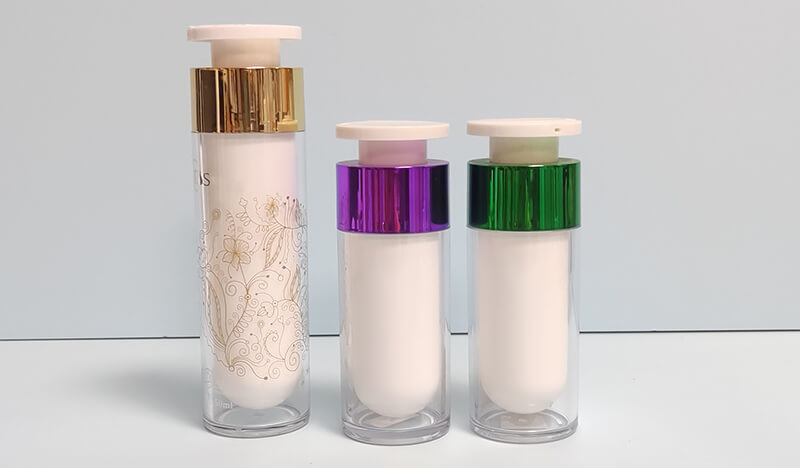
Airless pump bottles have become a popular packaging option for many cosmetic and skincare products. Unlike traditional pump bottles, which use a dip tube to dispense the product, airless pump bottles feature a vacuum system that pulls the product up from the bottom of the bottle. This unique design offers several benefits, such as preventing air exposure, reducing the risk of contamination, and allowing for more precise dispensing of the product. In this article, we will provide a step-by-step guide to assembling your airless pump bottle and discuss some tips for maintaining and using it effectively.
Outline
Step 1: Preparation
Before you begin assembling your airless pump bottle, it is essential to ensure that you have all the necessary parts and tools. Start by checking the packaging to confirm that all the components are included and that there is no damage to the bottle, pump body, pump cap, and nozzle.
Next, gather all the tools and parts required for the assembly process. This typically includes the pump body, pump cap, nozzle, and any other accessories that come with your airless pump bottle, as well as a clean surface to work on.
Once you have collected all the necessary parts and tools, it is essential to disinfect them thoroughly. Use a disinfectant spray or wipe to clean the surfaces of each component and tool. This step is critical to eliminate any bacteria or germs that may have accumulated during storage or shipping, ensuring that your airless pump bottle remains hygienic and safe to use.
Taking the time to prepare and disinfect all the parts and tools will ensure a smooth and efficient assembly process and help to extend the shelf life of your product.
Step 2: Installing the Pump Body
Once you have prepared all the parts and tools, you can begin assembling your airless pump bottle. The first step is to install the pump body into the bottle neck.
To do this, hold the bottle firmly and align the pump body with the bottle neck. Press down firmly on the pump body, ensuring that it fits snugly into the neck. Twist the pump body gently to ensure that it is in the correct position.
It is essential to ensure that the pump body is correctly installed, as this will affect the functionality of the airless pump system. If the pump body is not securely attached to the bottle neck, the vacuum system will not work correctly, and the product may not dispense properly.
Once you have installed the pump body, you can move on to the next step of assembling your airless pump bottle.
Step 3: Installing the Pump Cap
The next step is to install the pump cap onto the pump body. To do this, align the pump cap with the pump body and twist it clockwise until it is securely in place.
It is important to ensure that the pump cap is screwed on tightly to prevent any air from entering the bottle, which could potentially affect the quality of the product or cause contamination.
Check that the pump cap is installed correctly by pressing down on the top of the cap. If it moves or feels loose, it may not be tightened enough, and you should remove and reattach the cap to ensure a secure fit.
Once the pump cap is installed, you can move on to the next step of assembling your airless pump bottle.
Step 4: Installing the Nozzle
The next step in assembling your airless pump bottle is to install the nozzle into the pump body. The nozzle is the component that dispenses the product, and it is essential to ensure that it is installed correctly to prevent any leaks or malfunctions.
To install the nozzle, simply insert it into the pump body and twist it gently until it is in the correct position. Be careful not to twist it too tightly, as this could damage the nozzle or cause it to malfunction.
Once the nozzle is installed, test it by pressing down on the pump head. If the product is dispensed correctly and evenly, the nozzle is installed correctly.
If you experience any issues with the nozzle, such as leaks or clogs, disassemble the pump bottle and check the nozzle for any damage or debris. Clean the nozzle thoroughly and reassemble the pump bottle, ensuring that the nozzle is installed correctly.
With the nozzle installed, you have now completed the assembly of your airless pump bottle. The next step is to test the pump system to ensure that it is working correctly.
Step 5: Testing the Pump System
Before filling your airless pump bottle with product, it is important to test the pump system to ensure that it is working correctly. This step will also help to remove any air pockets that may be present in the bottle, which could affect the product’s dispensing.
To test the pump system, press down on the pump head repeatedly until the product begins to dispense evenly. It may take several pumps to remove any air pockets and activate the vacuum system fully.
If the product does not dispense correctly or there is no suction, check the assembly of the pump body and nozzle to ensure that they are correctly installed. You may also need to disassemble the pump system and clean the components to remove any debris or blockages.
Once you have confirmed that the pump system is working correctly, you can move on to the final step of filling your airless pump bottle with your desired product.
Step 6: Filling and Disinfecting the Bottle
Now that you have tested the pump system, you can fill your airless pump bottle with your desired product. Before filling, make sure that the bottle is clean and free from any dust or debris. You can clean the bottle with warm, soapy water and rinse it thoroughly before filling.
When filling your airless pump bottle, it is important to ensure that there is no air trapped inside the bottle. Air pockets can affect the vacuum system and the dispensing of your product. To prevent this, slowly and carefully fill the bottle, leaving a small amount of space at the top.
After filling, disinfect the bottle by wiping it down with isopropyl alcohol or another suitable disinfectant. This will help to prevent contamination and ensure that the product remains fresh and safe to use.
To remove any remaining air pockets in the bottle, hold the bottle upright and repeatedly pump the pump head until the product begins to dispense evenly. You may need to pump the head several times to remove any remaining air pockets.
Once you have removed all the air pockets, your airless pump bottle is ready to use. Remember to store the bottle in a cool, dry place away from direct sunlight to ensure the longevity of your product.
Step 7: Using and Maintaining Your Airless Pump Bottle
Congratulations, you have successfully assembled and filled your airless pump bottle! Now it’s time to enjoy the benefits of using this innovative packaging solution.
To use your airless pump bottle, simply press down on the pump head to dispense the product. Unlike traditional pump bottles, airless pump bottles do not rely on air to dispense the product, which means that you can enjoy more consistent and precise dispensing, and reduce the risk of contamination.
After each use, wipe down the pump head with a clean, damp cloth to remove any product residue or debris. This will help to keep the pump system working correctly and ensure that your product remains fresh and safe to use.
If you experience any issues with your airless pump bottle, such as a malfunctioning pump system or a damaged nozzle, disassemble the bottle and check the components for any damage or debris. Clean the components thoroughly and reassemble the bottle, ensuring that all components are installed correctly.
With proper care and maintenance, your airless pump bottle can provide a long-lasting and reliable packaging solution for your favorite products. Enjoy the benefits of this innovative packaging and experience more precise, consistent, and hygienic dispensing.
